Build & Deploy
In the previous section we wrote a simple smart contract. In this section we will build and deploy it to the blockchain using the Vaulta Web IDE.
What does a Smart Contract build to?
When you build a smart contract, it will produce two files:
mycontract.wasm- This is the compiled WebAssembly code that will run on the blockchain.mycontract.abi- This is the ABI file that describes the interface to your smart contract.
What is an ABI?
ABI stands for Application Binary Interface. It is a file that describes the interface to your smart contract. It contains information about the functions that your smart contract exposes, and the parameters that they take.
It also contains information about the data structures that your smart contract uses, and how they are stored in the blockchain. For instance, what tables are available, and what fields are in those tables.
What is WebAssembly?
WebAssembly is a binary instruction format for a stack-based virtual machine. It is designed as a portable target for compilation of high-level languages like C/C++/Rust, enabling deployment on the web for client and server applications.
Enough talk, let's build!
Go ahead and click the Build button in the lower left corner of the Vaulta Web IDE. You should see a message in the
console that says Building project...
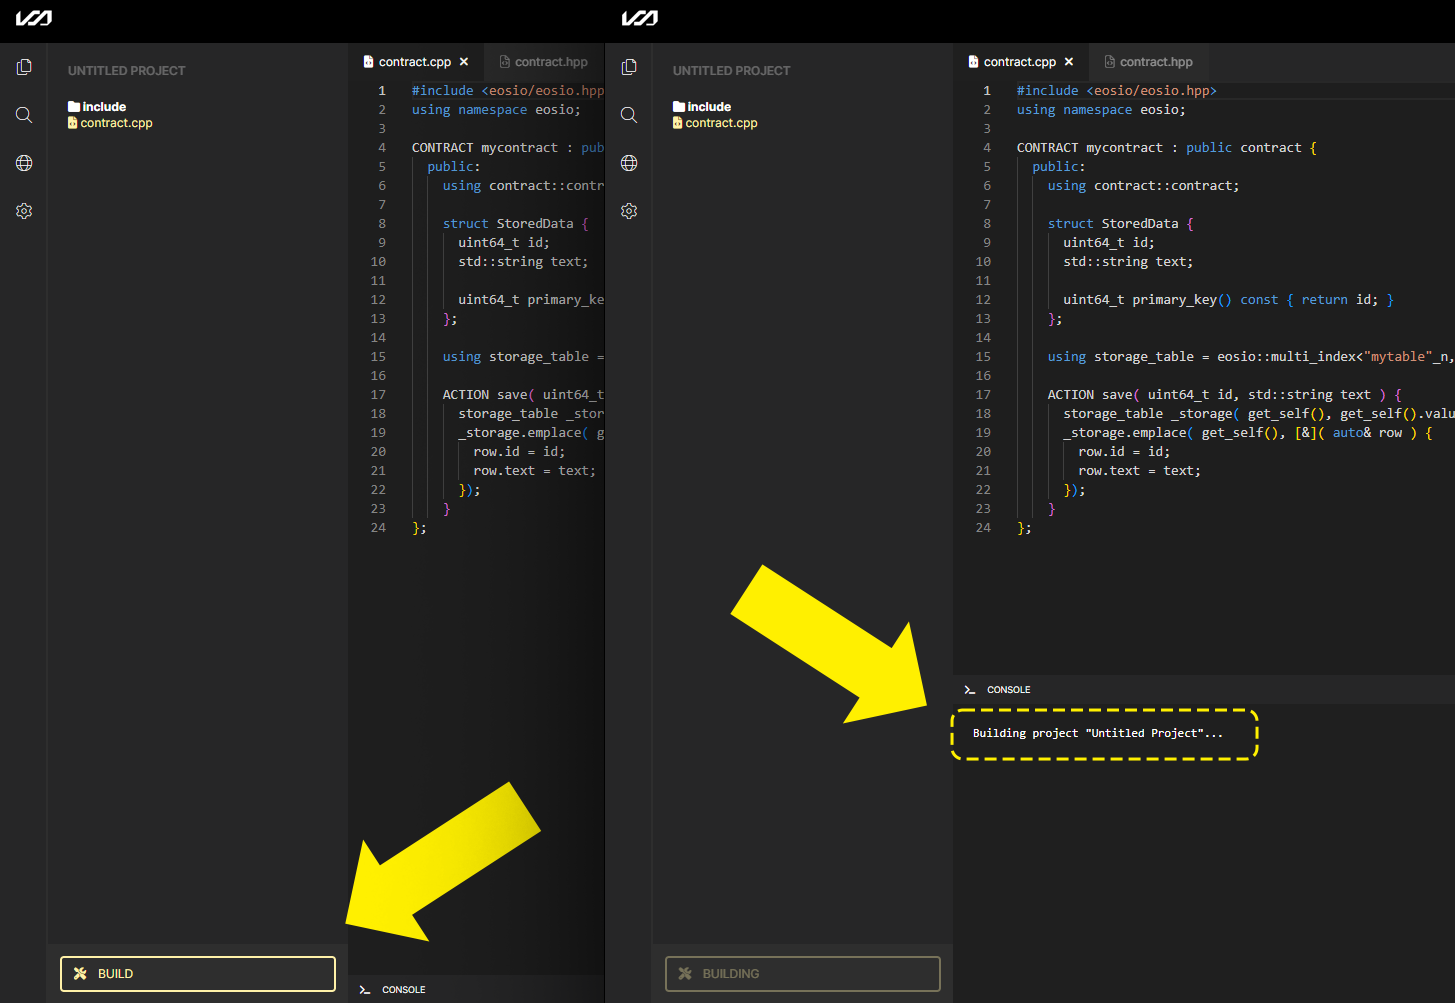
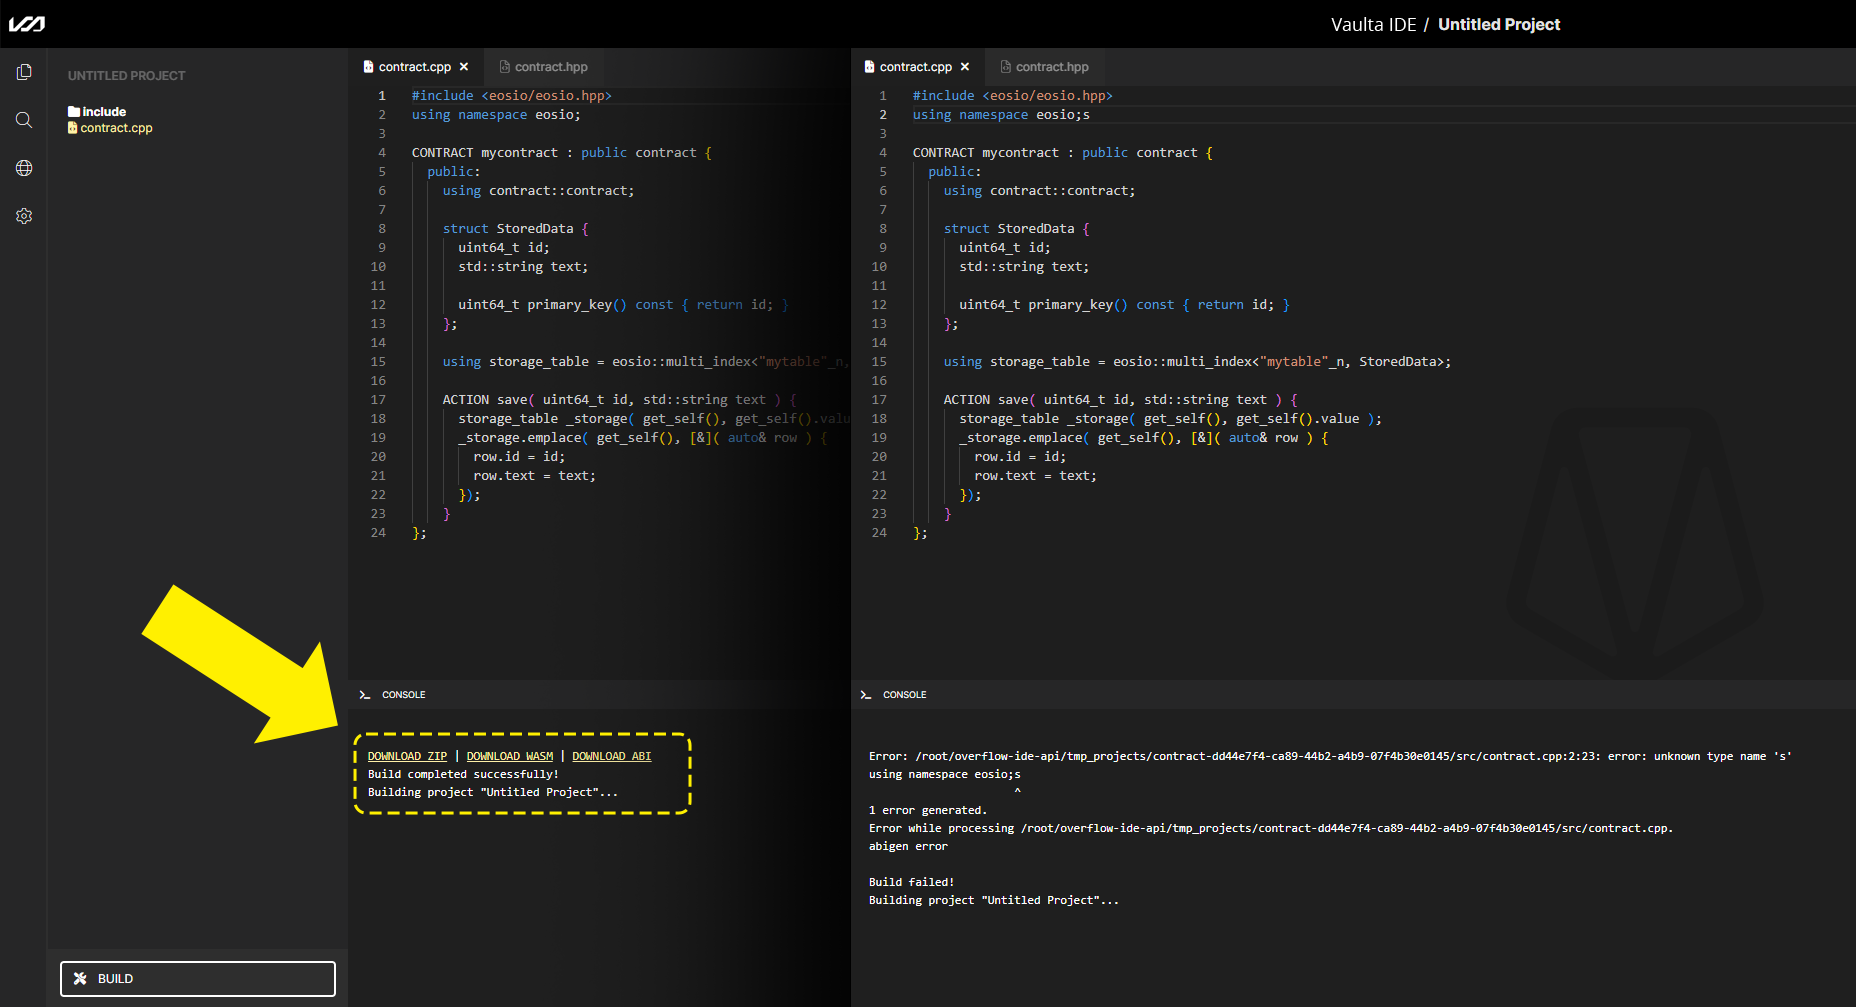
If the build succeeds, you will see the zip, wasm, and abi files in the console to be downloaded.
If the build fails, you will see the error message in the console, with the line number where the error occurred.
Deploying to the testnet
Now that we have a smart contract that builds without errors, we can deploy it to the blockchain.
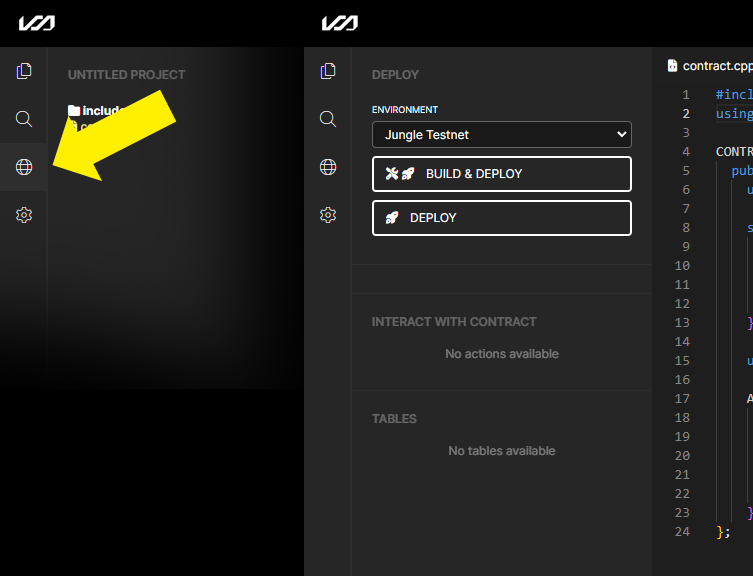
Click the deploy tab on the left-most sidebar to open up the deploy options.
Now you can click on the Build & Deploy button to deploy your smart contract to the blockchain.
This will deploy your smart contract to the Vaulta Jungle Testnet, and allow you to interact with it.
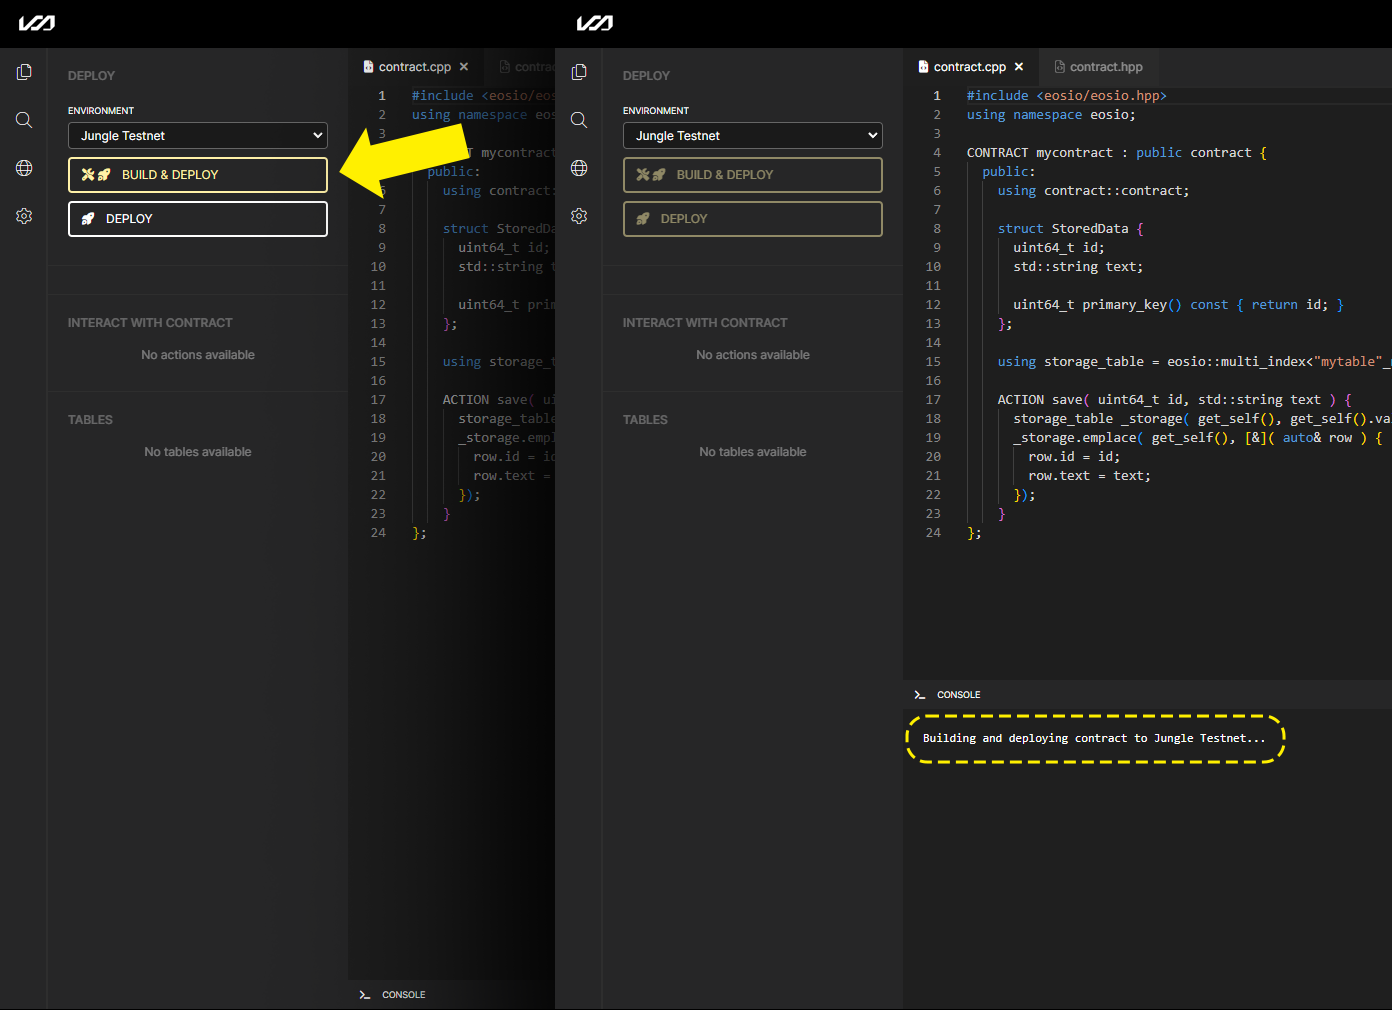
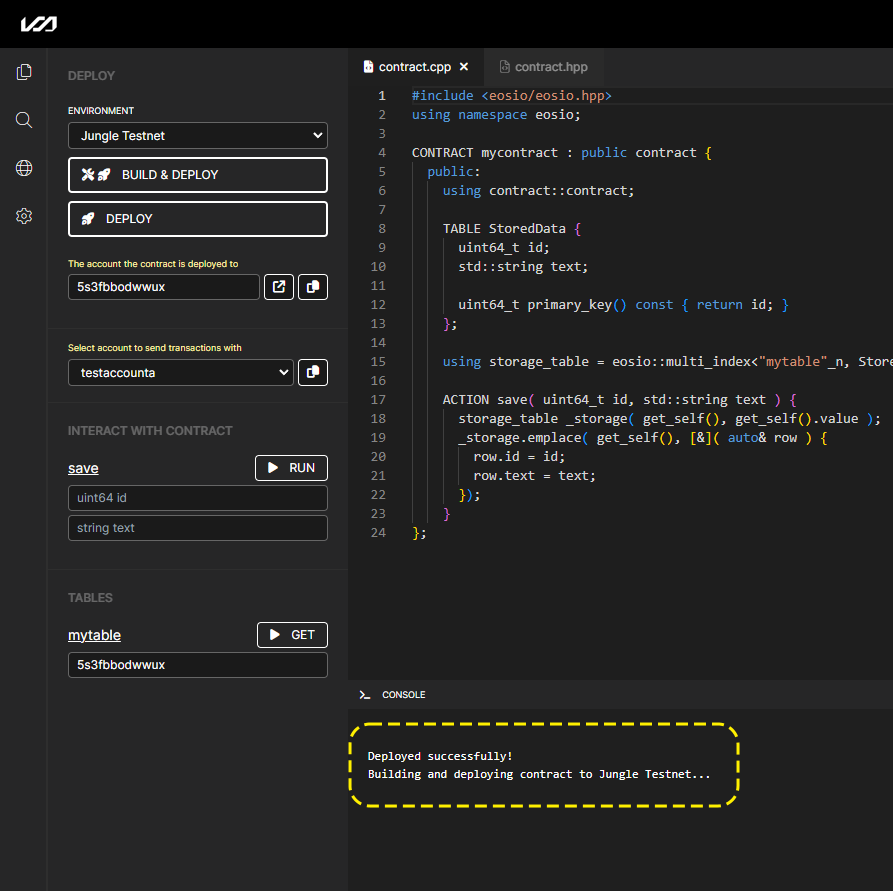
If there are any errors during the deployment process, you will see them in the console. If not,
you will see a message that says Deployed successfully!.
Interacting with the contract
Now that we have deployed our smart contract to the blockchain, we can interact with it.
Once deployed, the sidebar will update to show you the:
- Account the contract was deployed to
- A list of accounts you can use to interact with the contract
- The actions that the contract exposes
- The tables that the contract exposes
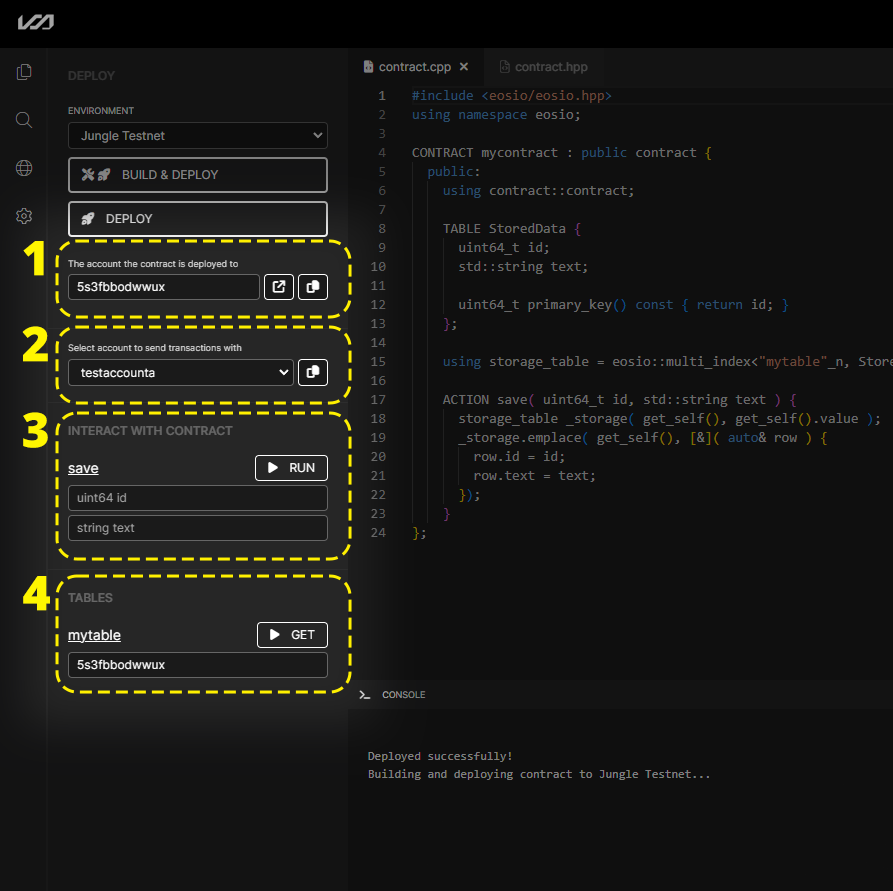
You can fill out the fields for the save action and click the RUN button to execute the action.
You can also click the GET button next to the table that you want to query to see the data in that table,
you will get a JSON output in the console.

Congratulations!
You've now built and deployed your first smart contract to the blockchain, and interacted with it.
It's time for you to start building your own smart contracts! These docs will lead you through ever step of the way, but your first step is learning about the Anatomy of a smart contract.
You might also want to study some of the Core Concepts of the blockchain.